CJMCU-811 with Raspberry Pi
How two measure carbon dioxide CO2 with the Raspberry Pi?
… with a cheap and not very complex Solution.
There are a lot of different gas sensors out there, which are able to measure a specific gas concentration (MQ Gas Sensors). Some of them are not so expensive like the MG-4 methane sensor (about 3,50 €). There is also a sensor for carbon dioxide which is called MG811, but this sensor costs about 60€. So it’s to expensive for the planned use. Additional there are two technical disadvantage in combination with the Raspberry Pi. One disadvantage is that all of these gas sensors measures analog values, which can’t be read by the Raspberry Pi directly. So we need a additional analog to digital converter (a/b) like the (MCP3008). They are not very expensive, but makes our solution a little bit more complex. The other disadvantage is the required heating voltage of 6V. This results in two additional challenges. We need a external power solution (Raspberry Pi has only 5V) and we need a logic level converter to reduce the voltage from 6 (or 5V for normal operation) to 3,3 V which is required for the uses with the Raspberry Pi GPIO Ports.
For this reasons I searched for another solution and found the sensor “CJMCU-811”, which can measure the temperature, air quality (VOC) and the CO2 concentration. The required a/b converter is also integrated. So we have an all in one board/sensor! The connection to the Raspberry Pi works over I2C. The tempature is required for calibration of the sensor. The CO2 concentration is measured as eCO2 value (equivalent calculated carbon-dioxide) within a range of 400 to 8192 parts per million (ppm).
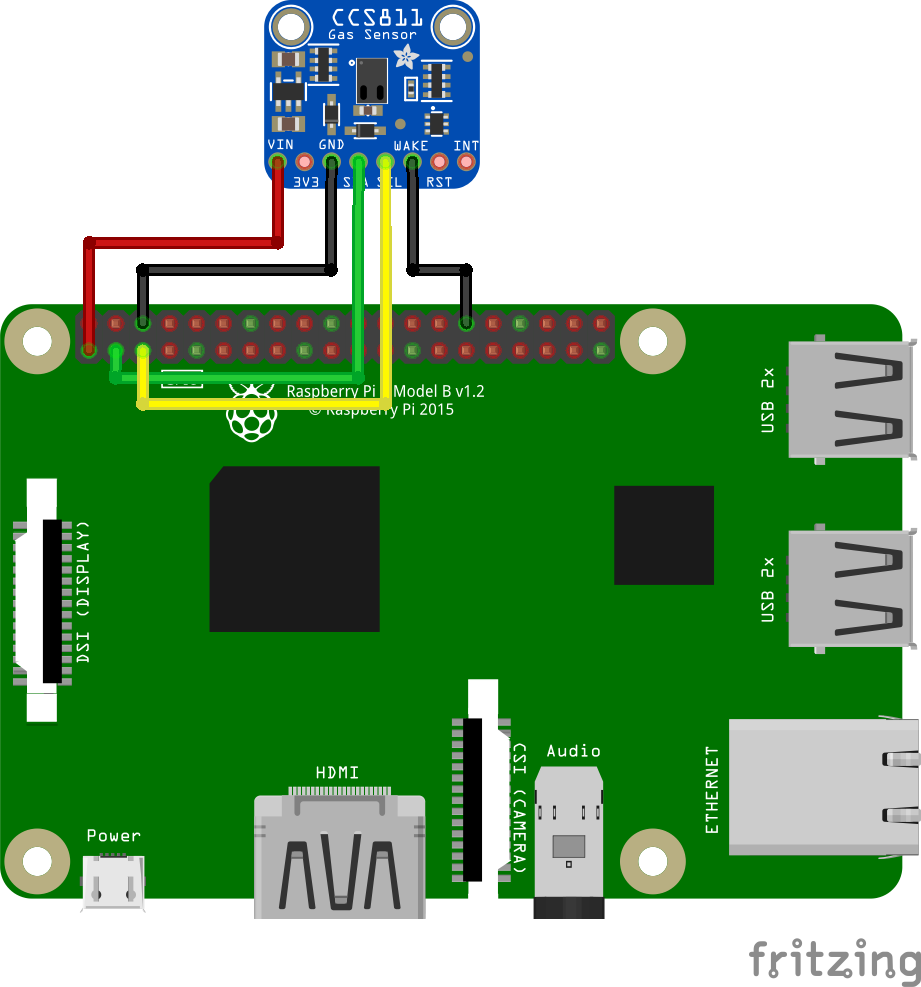
There is a similar sensor from Adafruit with the name CCS811. This sensor looks a little bit different (blue and not red) and has a different pinout, but it’s the same sensor.
Connection to the Raspberry Pi
To connect the sensor with a Raspberry Pi we need to enable the I2C Interface. Additional we need to slow down the speed/baudrate of the I2C bus to 10khz, because the RaspberryPi doesn’t support “Clock Stretching”. Clock Stretching will hold the line down until the sensor (slave) has processed the information. Because this is nt supported we need to slow down the speed to be sure the information is processed until the signal goes to high. Good description of the problem: https://github.com/paulvha/ccs811/blob/master/documents/CCS811_clock_stretch.odt To change the bus speed we need to add an addtional line to the config.txt file.
sudo nano /boot/config.txt
Change bus speed with the additonal line:
dtparam=i2c_baudrate=10000
During my test I found some information about problems and inconsistent bus speeds with some Raspberry Pi models, but with my Raspberry Pi 3 B/B+ I can’t figure out any issues regarding the connection to the sensor.
After a reboot we can connect the sensor with the Pi:
You can check if the Pi can connect to the sensor with the terminal command “i2cdetect -y 1”. If you see the number “5a” with the output table.
The Python code
There is an Adafruit code which can be easily installed over “pip” and from GitHub: https://learn.adafruit.com/adafruit-ccs811-air-quality-sensor?view=all#install-python-software-8-1
But during my research I found a good Youtube video with a Gist code: https://www.youtube.com/watch?v=XNtbV1Z5W3o
The author of this code has integrated a connection to the Thinkspeak API, a data collection cloud service with a dashboard for your values. So you can deploy a dashboard with your values with a Thinkspeak account very easily.
You can download the code with “git” and start it with Python (Version 2).
git clone https://gist.github.com/xxlukas42/60ae08f75e68a0cfcdb7c9dd60145d34
cd CJMCU-811
python ccs811.py
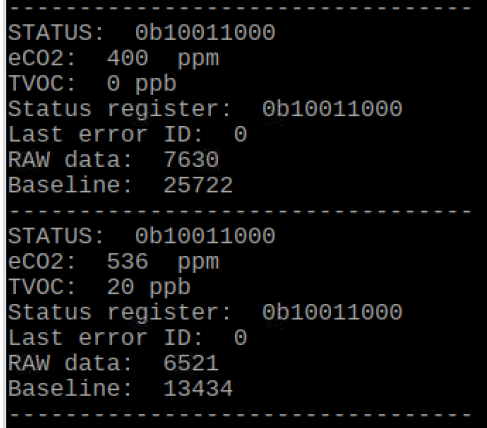
If everthing works correctly you should see an output like this (default measure interval 60 seconds):